5 Steps for Repotting your Indoor Plants

One of the most commonly asked questions that we get at In-House Greens is, How do I repot my houseplant?
So we decided to put together a little tutorial with pictures to help you pot-up your container plants.
We’ll cover everything you need to know, starting with how to tell when its time to pot-up and tips on choosing the right soil and the right container. After that, we’ll take you step-by-step through the repotting process with easy to follow instructions and lots of photos.
Let’s get started!
A couple things to look for when deciding if your plant is rootbound.
- Are there roots coming out of the holes in the bottom of the grow pot?
- Are there visible roots starting to come out of the surface of the soil?
- How long has the plant been in the container?
The root systems for houseplants vary, but most houseplants should be potted-up once every year or so, depending on the type of plant. Regardless of the species, most container plants will love some fresh, nutrient-rich soil and a little more breathing room. Plants tend to stay rather small in containers compared to how they grow in the wild. To keep your container plants happy and healthy, it’s best to pot-up once a year.
When choosing soil you?ll have to know the name of your plant. Whether you use a basic organic compost soil, a volcanic nutrient-rich soil, a more acidic-based soil, or a more sand-based drainable soil – this will depend on the type of houseplant. Do your research.
Choosing the right container is a little easier. Always use a container that has holes in the bottom to offer proper drainage and to avoid things like overwatering and root-rot. When repotting you’ll want to go up 1 or 2 container sizes.
For this guide, We used a regular, enriched organic soil to pot-up a 6″ Aglaonema into an 8″ growpot.


With a new, larger pot and some fresh, nutrient-rich soil, your houseplants will stay happy and healthy.
Contact us if you have any questions and be sure to let us know how your repotting experience went!
Want new articles before they get published?
Subscribe to the IN-HOUSE GREENS newsletter.
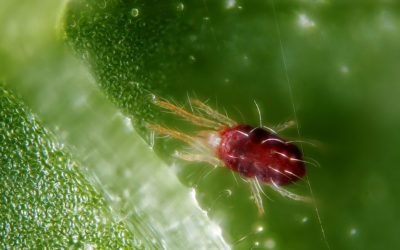
3 Easy Steps for Dealing with Spider Mites
Spider Mites are one of the most common indoor plant pests and can very quickly kill your healthy houseplants.